v1.2.3 · Stable
Download BranchPy
BranchPy is free for individual Ren'Py developers. No payment, no application required.
Download the package below and follow the install instructions.
⏱ See your story structure in under 2 minutes — no setup, runs locally.
Trust note: telemetry is disabled by default, source code and file paths are never transmitted, and individual Ren'Py developers get free all-command access.
Before you start
- You can install and explore BranchPy without an account
- Full analysis features require a free account
- Setup takes about 5 minutes
What you'll see
After your first run, you'll immediately see your full story map, unreachable branches, and logic issues explained.
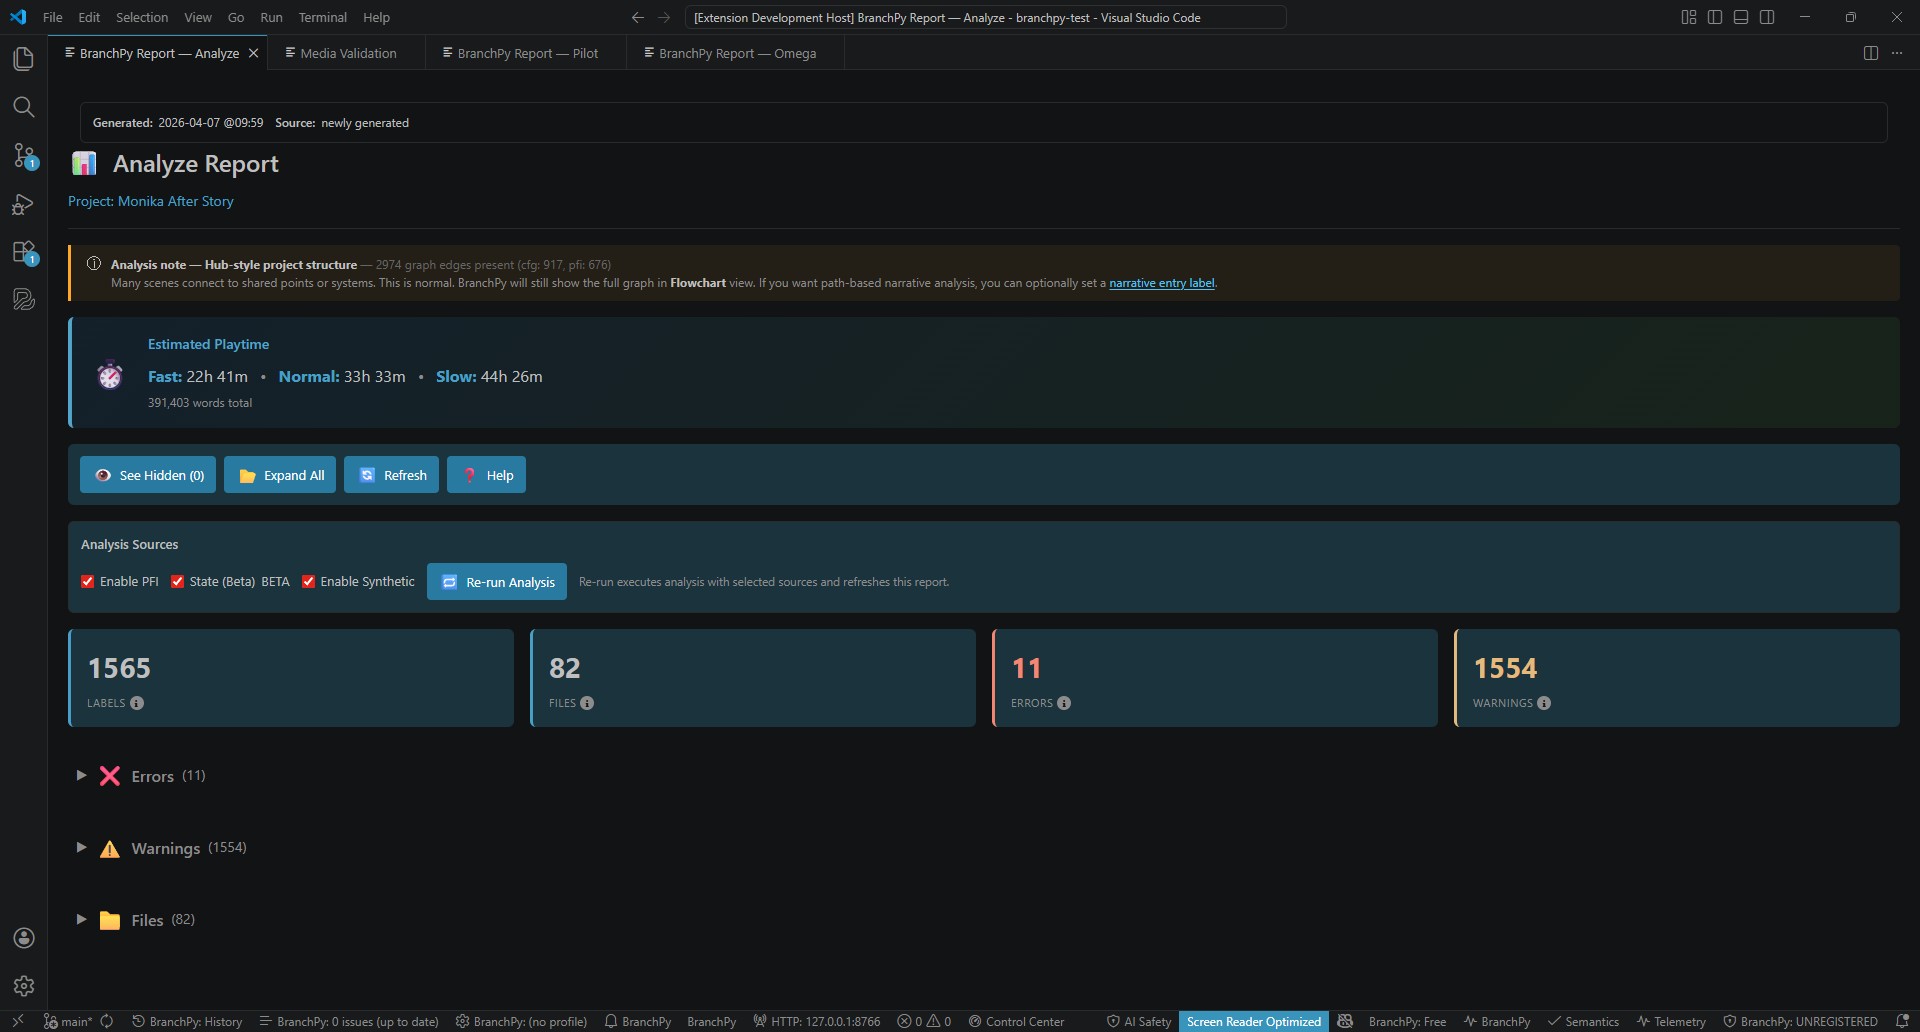
Analyze: errors, warnings, story flow
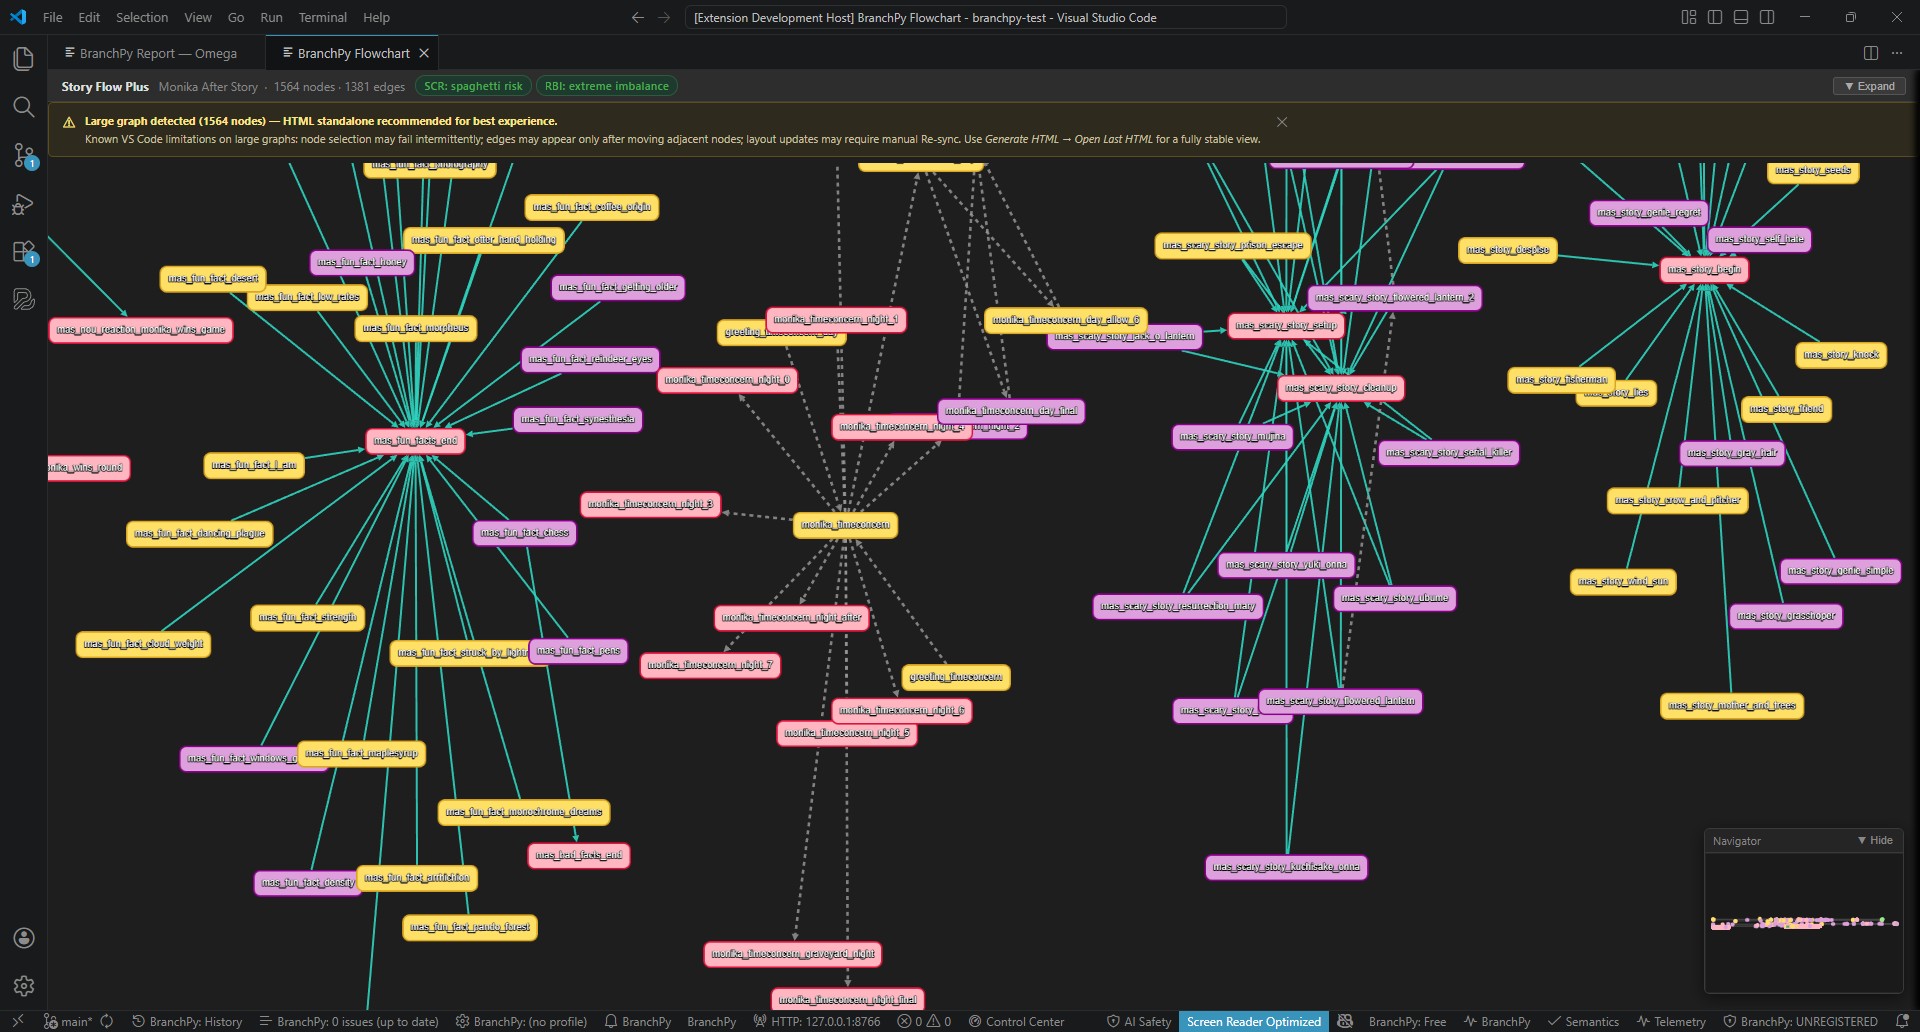
Flowchart: interactive story map
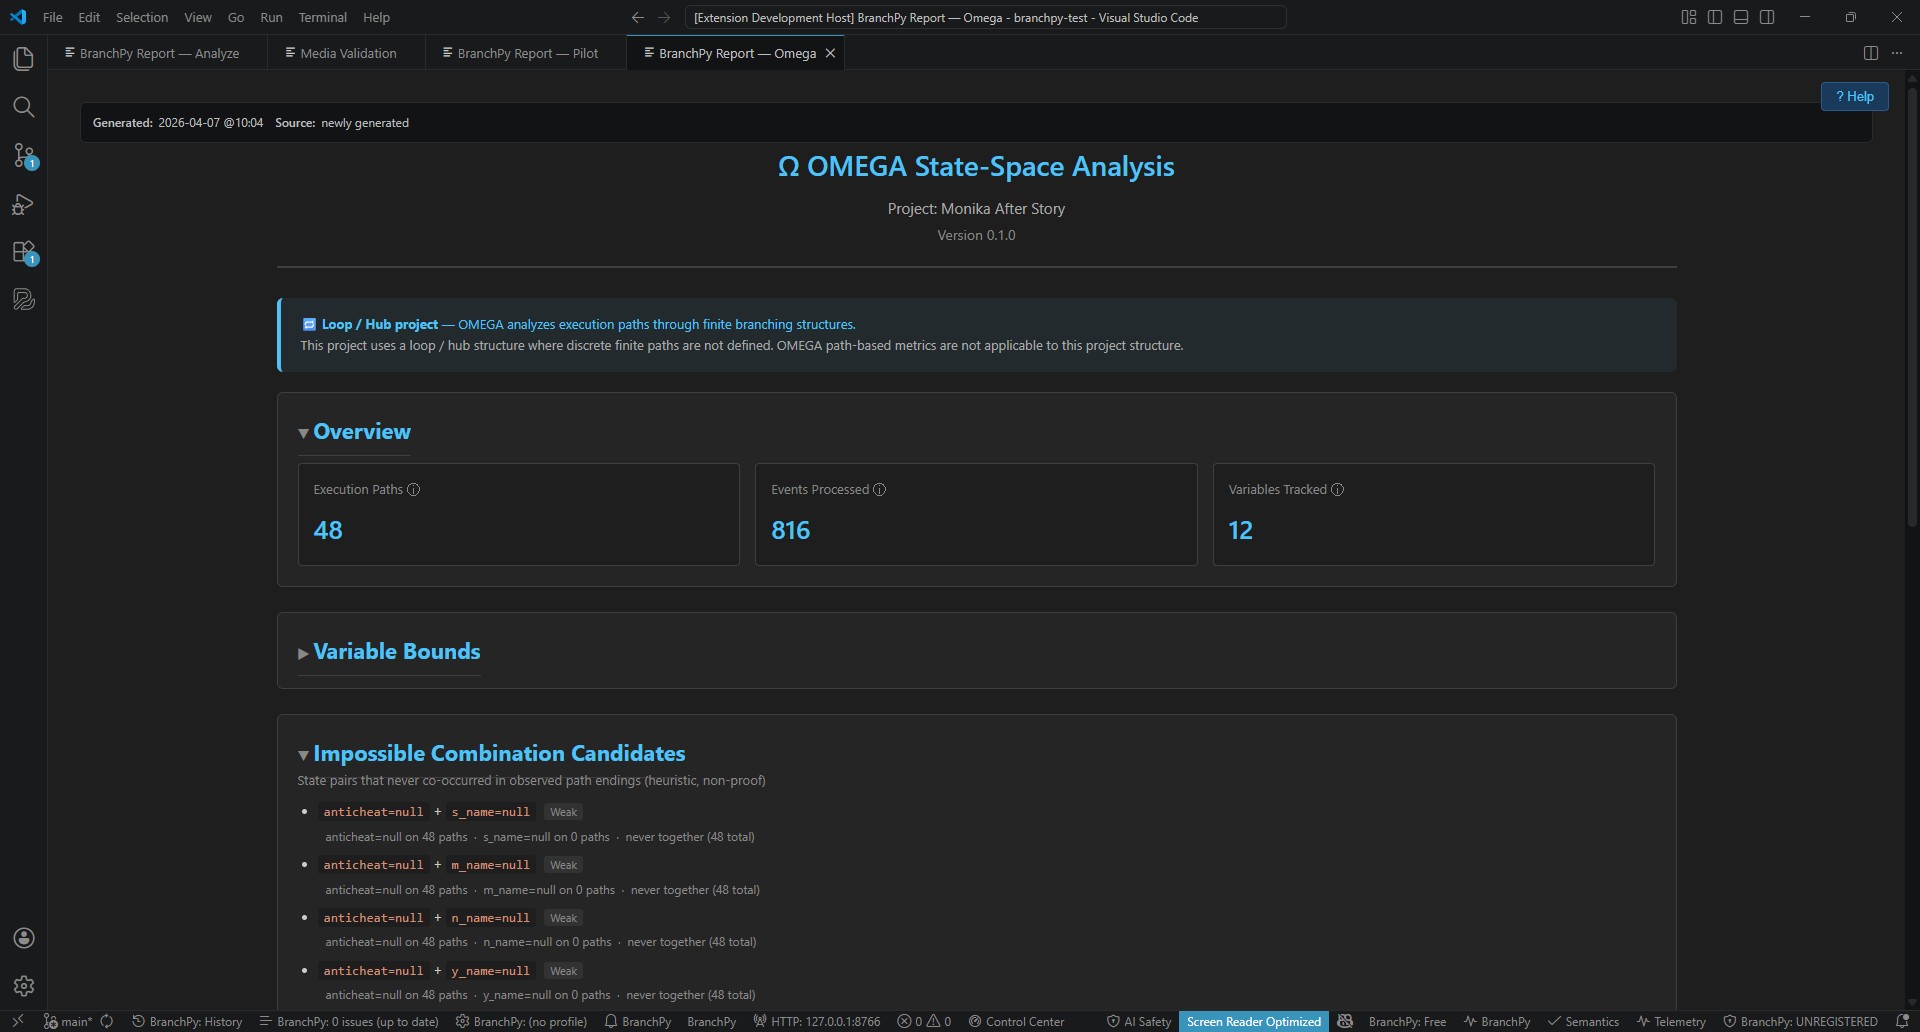
Omega: deep structural insight
Install in 2 minutes
On all platforms, the recommended path is pip install branchpy-cli. On Windows, an alternative installer is also available above. Follow the instructions below for your setup.
⬇️ Alternative · Windows
Windows — alternative installer
Download the installer — it sets up the BranchPy CLI automatically. If VS Code is detected on your machine, the extension is installed too.
- Download branchpy-setup-1.2.3-stable.exe from the section above.
- Double-click to launch the installer. Python is installed automatically if not already present.
- If VS Code is detected, the extension is installed automatically. If not, install the .vsix manually afterward (see the download link above).
- Open VS Code, open the BranchPy Control Center in the sidebar, and run Analyze.
Upgrading? Re-run the installer — it replaces the previous version automatically.
✅ Digitally signed — BranchPy inc.
The installer is signed via Microsoft Artifact Signing. Windows will show BranchPy inc. as the verified publisher.
Note: Windows may still display a warning for new apps — this is normal. If you see it, click More info then Run anyway.
🚀 Recommended · all platforms
macOS / Linux / Windows — direct install
Install the CLI from PyPI, then install the VS Code extension using the .vsix.
pip install branchpy-cli
code --install-extension branchpy-vscode-1.2.3-stable.vsix
- Install Python 3.11+ if not already available.
- In a terminal, run
pip install branchpy-cli to install the CLI.
- Download the .vsix from the section above and run
code --install-extension branchpy-vscode-1.2.3-stable.vsix.
- Run your first analysis: python3 -m branchpy --project path/to/project analyze
- Add --open to open Flowchart, Media Validation, or reports in your browser.
You can also install from the downloaded .whl file if you prefer to avoid PyPI. Flowchart in CLI/browser mode is an interactive read-only viewer. FlowchartPlus in VS Code remains the richer workflow.
👉 Next step:
Open VS Code, click the BranchPy icon in the sidebar, select your project, and click Analyze. Your first story map opens in seconds.
See the full getting-started guide →
Like BranchPy? If it helps your workflow, you can support development directly without scrolling to the end of this page.
Get Started Fast
Once installed, follow these steps to create your account, connect the tool, and run your first analysis.
Read the full documentation →
Before you start: installation is covered in the section above. BranchPy works best when your Ren'Py project uses a standard structure: a game/ folder containing .rpy files. Use the project selector in BranchPy Control Center — do not assume the active VS Code folder is already the right target.
VS Code workflow
- Create an account at branchpy.com/register. Free, no payment required.
- Unlock full features: in your account, open Profile → License and click Claim Ren'Py Free.
- Sign in via SSO: in VS Code, the BranchPy Control Center (BPy CC) will show a sign-in prompt. Click it — it opens a browser tab where you authenticate with your BranchPy account.
- Approve your device: on first sign-in, a device approval link is sent to your email. Click it to authorise this machine. You only do this once per device.
- Select your project: in the BPy CC sidebar, choose your Ren'Py project from the detected project list. If it doesn't appear, use the folder picker.
- Run Analyze — click the Analyze button. The report opens in the panel with errors, warnings, and insights.
- Then explore: click Flowchart for the interactive story graph, Stats for narrative metrics, Media Validation for asset checks. Each opens its own panel — you can have multiple open at once.
CLI workflow
- Create an account at branchpy.com/register.
- Unlock full features: in your account, open Profile → License and click Claim Ren'Py Free.
- Sign in via SSO: run
branchpy login — this opens a browser tab where you authenticate.
- Approve your device via the link sent to your email. One-time step per machine.
- Store your project path so you don't retype it on every command:
# PowerShell
$P = "C:\path\to\my-game"
# Bash / Zsh
P="/path/to/my-game"
- Run your first analyses:
branchpy --project "$P" analyze --open
branchpy --project "$P" stats --open
branchpy --project "$P" media --open
branchpy --project "$P" flowchart --open
- Useful options on any command:
--open — opens the result in your browser automatically--html — saves an HTML report to disk--json — outputs machine-readable JSON--save-report — saves the report alongside the project
Account, license, and first-run answers
Do I need an account?
You can run your first analysis without one. Create a free account at
branchpy.com/register to unlock full analysis features.
Is BranchPy free?
Yes — free for individual Ren'Py developers. No payment, no time limit. A small contribution is asked for commercial games only, on a trust basis — no audits.
What is Ren'Py Free?
Free access for Ren'Py developers — unlocks all commands. Free for personal projects, small contribution for commercial games — on a trust basis, no audits.
What happens after pre-release?
Most features remain free for personal Ren'Py projects. A small contribution will be asked for commercial games only — on a trust basis, we don't check your work. Optional AI features may require a Pro plan.
How to unlock full features: create a free account on BranchPy, open Profile → License, then click Claim Ren'Py Free.
CLI account and license commands: use the branchpy license command family, such as branchpy license login, branchpy license status, and branchpy license claim-renpy.
Current development status
Stable features
Analyze, Stats, Compare, Media Validation, Flowchart, FlowchartPlus, Control Center, Pilot.
Early access features
Omega, PFI, Compare Lanes, Patch Timeline, Governance.
Known issues
Some edge cases may still appear in large or unusual projects. Bug reports help improve the tool quickly.
Troubleshooting before you report a bug
- Opened the wrong folder? Open the Ren'Py project root, not a parent folder above it.
- VS Code visuals missing? Some visual surfaces can open in the browser when native VS Code support is not present.
- Need to check what BranchPy collected? Telemetry is disabled by default and reviewable before anything is sent.
Help improve BranchPy
Early users are part of the product loop. Report bugs, suggest features, join the community, or support development with a coffee.